Udacity Self-Driving Car Nanodegree Project 12 - Semantic Segmentation
I’m getting all misty-eyed over here, probably because I’ve progressed to the fourth stage of grief over the looming end to the Udacity Self-Driving Car Engineer Nanodegree program. As I write this my team has written roughly a quarter of the code for the final project. I can’t believe it. When I look back on my life, 2017 will be defined by this experience. What will 2018 bring? Hopefully an exciting new career in this field, thanks in no small part to Udacity. (And trust me, I’m working on it! I expect to have some good news to report in, oh, six weeks or so.)
As I mentioned before, the Path Planning project turned out to be a bit of a beast (somewhat of my own creation) and the final project is shaping up to be similarly hairy, even tackling it as a group. Thankfully the Semantic Segmentation, aka Advanced Deep Learning, project was relative respite. That’s not to say semantic segmentation is simple, by any means - just that Udacity (and their partner Nvidia) did a good job of distilling this project down to its key concepts and giving us straightforward steps to implement ourselves. They didn’t give us everything we needed, even after releasing a walk-through video, but perusing the Slack channel and implementing the suggestions of other students made it quite manageable (hint hint, to those coming after me).
Ok, so what the heck is semantic segmentation, anyway? Well, a picture is worth a thousand words, right?
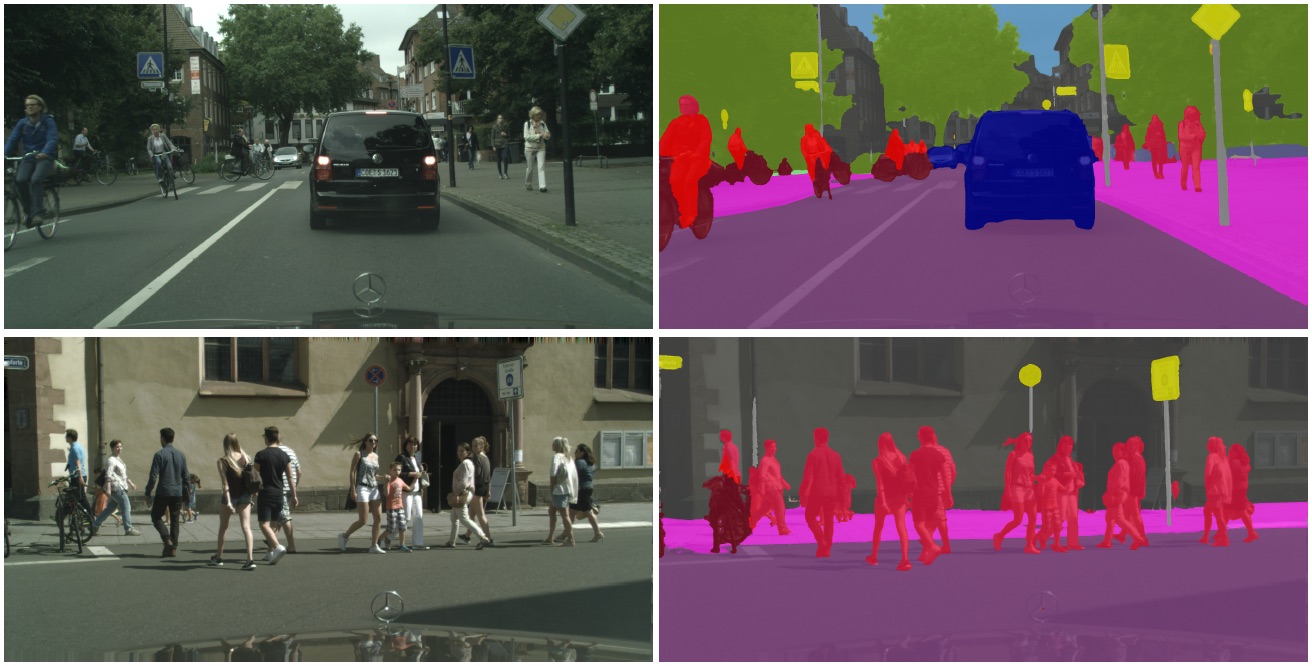
We’ve learned before that convolutional neural networks can detect and classify objects in images. The Traffic Sign Classifier project (from waaaay back in January!) is an example of one of the earliest (and simplest) neural net architectures (LeNet) for classifying images. We’ve come a long way since then, and the architectures have become quite complex but also capable of identifying a thousand different types of objects in an image.
Well, someone somewhere somehow had the idea that you can take one of these image classification architectures and just change the final fully-connected layer to a 1x1 convolution, add a few skip layers, some de-convolutions (no, I’m not going to take you down that rabbit hole - if you’re interested read the paper), and SHAZAM the neural net doesn’t just tell you there’s a dog in that image of yours, but it can tell you which pixels of that image belong to the dog. Seriously?! Well, yes… but you also have to feed it images with individual pixels labeled according to their class (which sounds like a pain in the ass, but the results are striking).
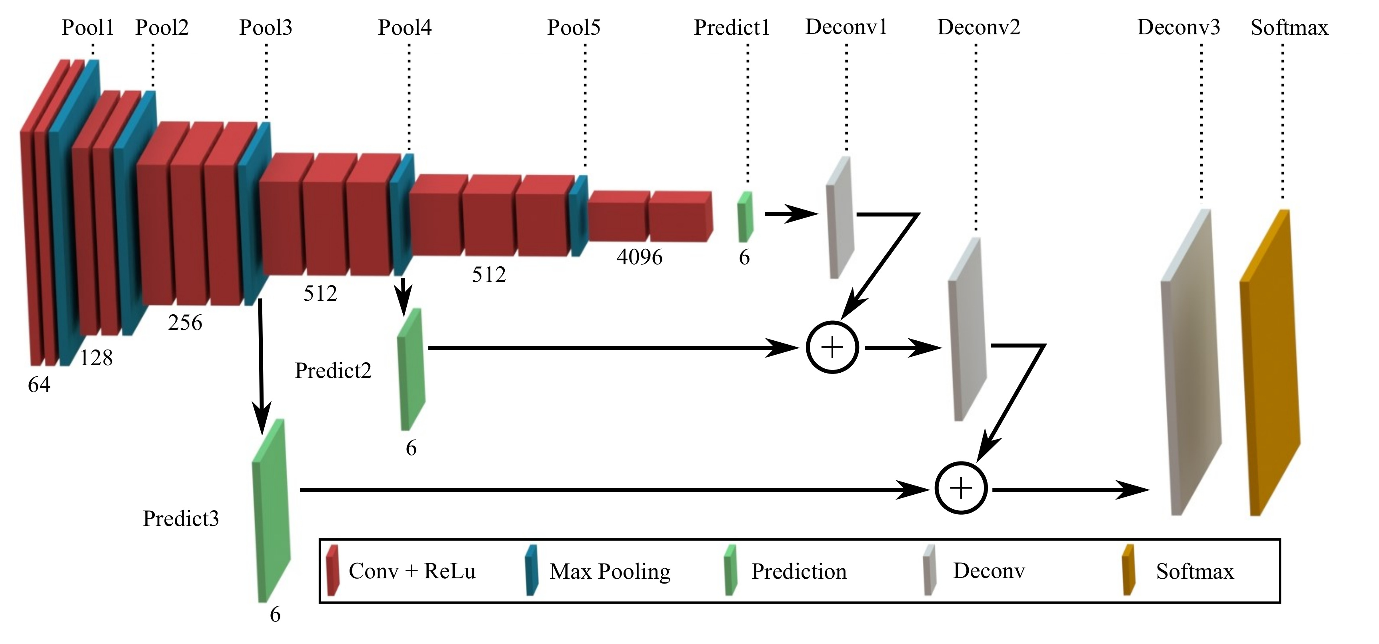
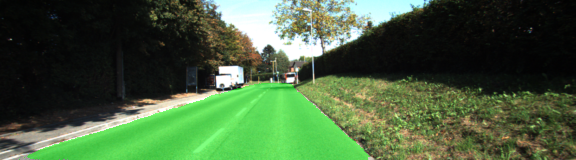
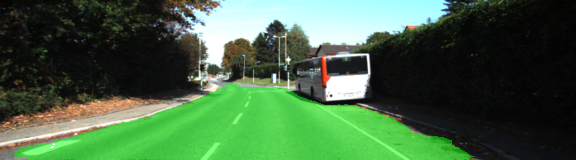
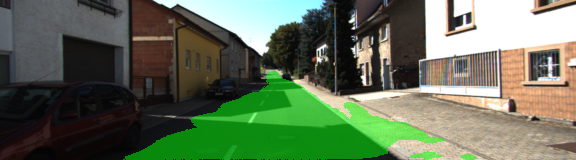
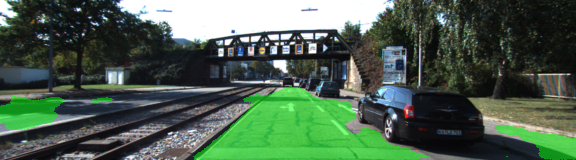
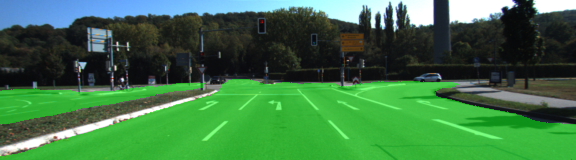
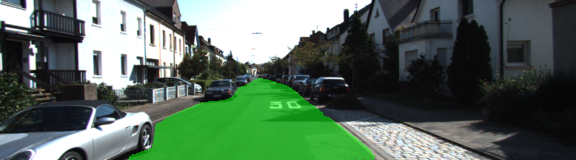
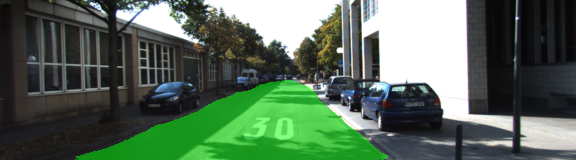
The objective of this project was to identify and label just the drivable area of the road in an image. Even using a single class/label, the training times verged on ridiculous and using a powerful GPU was all but mandatory (I believe some students reported training for upwards of days using only a CPU). Going into the project, my main misconception was that the neural net should be symmetrical, and that each convolution and pooling layer from the original architecture (we were using pre-trained VGG-16, in this case) necessitated a corresponding upsampling layer. We were instructed to only build skip layers for layers 3 and 4 of the VGG architecture (the final fully-connected layer, 7, was also converted to a 1x1 convolution), and my final architecture includes only a single de-convolution from layer 7 to layer 4, another from layer 4 to layer 3, and one more before the final softmax output (as depicted in the image below), though some other students reported even better results with additional de-convolution layers.
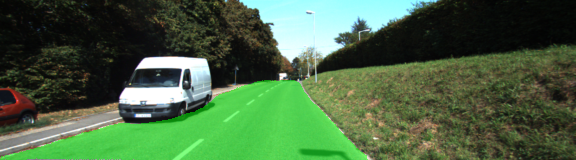
The result, at first, was awful. The output is meant to be the original image with the drivable area overlaid in semi-transparent green, but mine was producing what looked like the original image with a bunch of faint green static all over. Definitely not correct. It was after adding a kernel initializer and regularizer to each layer, and bumping up the number of epochs considerably that I was able to achieve results like these:
Not bad, eh? It was a fun exercise - always nice to get a little more practice with TensorFlow. And I just have that much more respect for the guys and gals out there in the trenches advancing this incredible technology.
The code for this project, as well as a short but more technical write-up, can be found on my GitHub.