Udacity Self-Driving Car Nanodegree Project 4 - Advanced Lane-Finding
Welcome to the mom version (Hi mom!); if jargon and mumbo jumbo are more your style then by all means, otherwise enjoy!
Project number four for Term 1 of the Udacity Self-Driving Car Engineer Nanodegree built upon the first project, more so than the second and third projects. While that might seem obvious because they both involve finding lane lines, the reason for this under the hood (har har) is that while projects two and three introduced us to the hot-ass newness of deep learning to damn near write our code for us, projects one and four rely on more traditional computer vision techniques to get very explicit about how we go from input to output. It’s almost a let down - like trading a keyboard in for a pencil - but people are saying (do I sound presidential?) that companies still rely on these techniques, so it’s definitely worth learning (and still fun and challenging) and the OpenCV library is the one doing all the heavy lifting anyway.
“So let’s grab a dashcam find some lanes!” you’re saying. Well, hold on just a second, Tex. You can’t just start finding lanes all willy-nilly. For starters, that camera you’re using? It distorts the images. You probably couldn’t even tell, but it’s true! Look:

Thankfully this can be corrected (for an individual camera/lens) with a handful of photos of chessboards and the OpenCV functions findChessboardCorners and calibrateCamera. Check it out:

I know - it looks almost the same to me too, but the distortion is most noticeable at the corners of the image (check out the difference in the shape of the car hood at the bottom).
Now we can get to the fun stuff. The next step was to apply a perspective transform to get something of a birds-eye view of the lane ahead. Here’s what it looks like:

I probably went to greater lengths than necessary to get my perspective transform juuuust right (making straight lines perfectly vertical in the resulting birds-eye view), but since the transform is reversed according to the same rules it probably didn’t matter much in the end.
Next, I explored a few different color transforms and gradient thresholds to try to isolate the lane lines and produce a binary image with 1s (white) where a lane line exists and 0s (black) everywhere else. This was easily the most delicate part of the process, and very sensitive to lighting conditions and discolorations (not to mention those damn white cars!) on the road. I won’t bore you with the details; suffice it to say this is where I spent most of my time on this project. In the end I combined a threshold on the B channel of the Lab colorspace to extract yellow lines and a threshold on the L channel of the HLS colorspace to extract the whites. Here’s what each of those looks like:


And here they are combined on several test images:
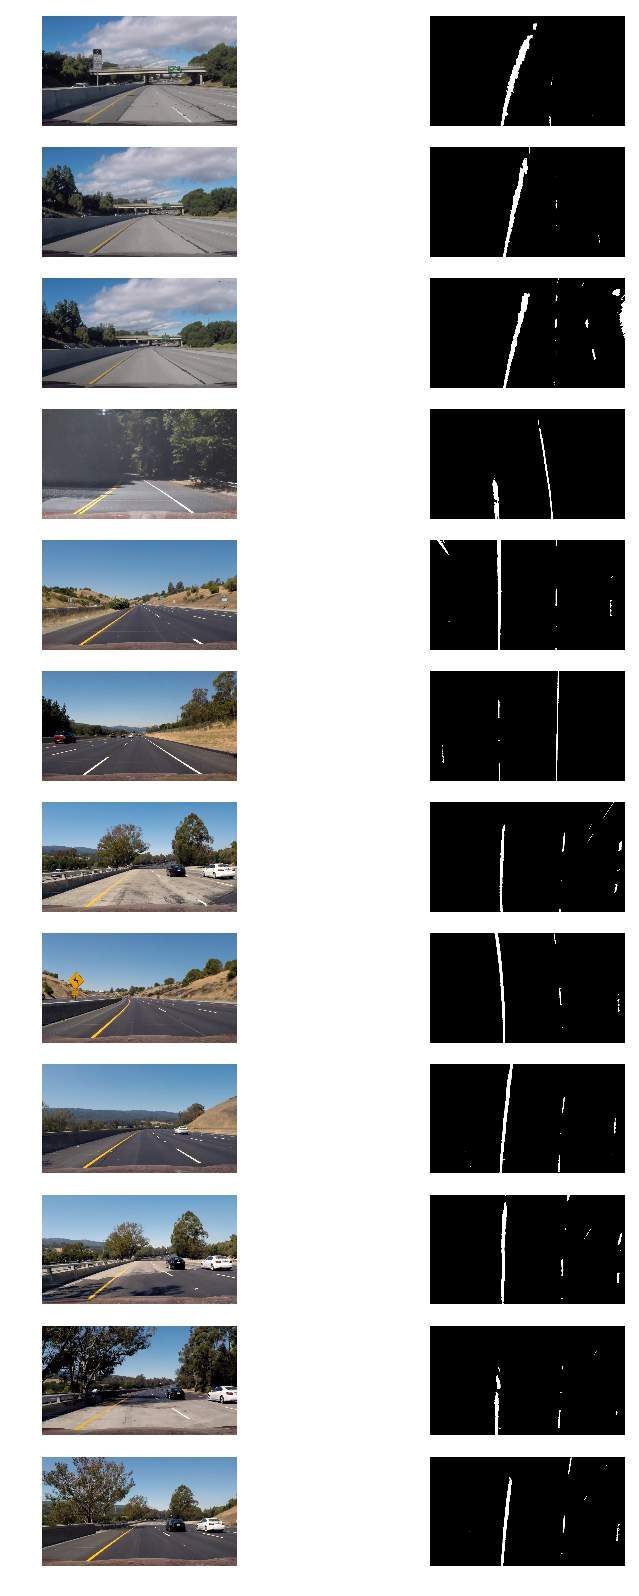
Not too shabby!
Now, the clever bit: it would be unnecessary (and computationally expensive) to search the whole image to identify which pixels belong to the left and right lanes, so instead we computed a histogram of the bottom half of the binary image, like so:
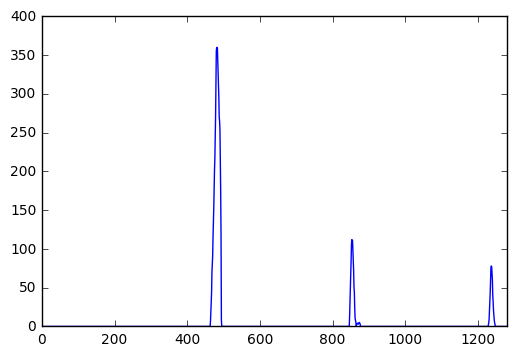
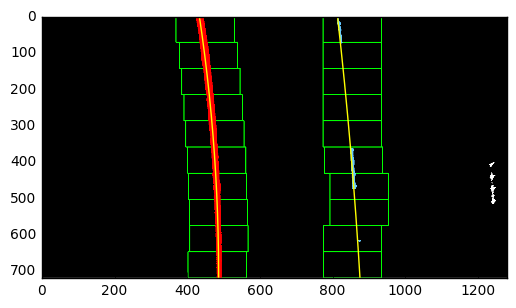
The peaks on the left and right halves give us a good estimate of where the lane lines start, so we can just search small windows starting from the bottom and essentially follow the lane lines all the way to the top until all the pixels in each line are identified. Then a polynomial curve can be applied to the identified pixels and voilà!
And not just that, but it’s even easier to find pixels on consecutive frames of a video using the fit from a previous frame and searching nearby, like so:
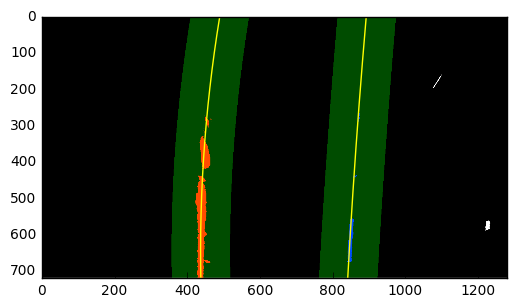
It’s just a matter of coloring in the polynomial lines and a polygon to fill the lane between them, applying the inverse perspective transform, and combining the result with the original image. We also did a few simple calculations and conversions to determine the road’s radius of curvature and the car’s distance from the center of the lane. Here’s what the final result looks like:
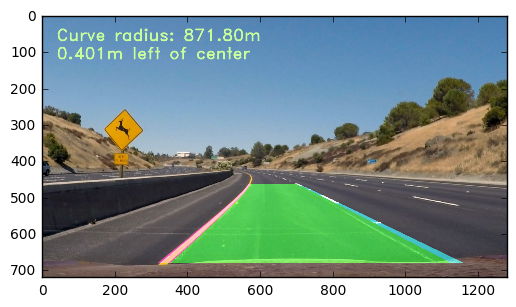
This is the pipeline that I applied to the video below, with a bit of smoothing (integrating information from the past few previous frames) and sanity checks to reject outliers (such as disregarding fits that aren’t within a certain distance apart).
Here’s a link to my video result, and here’s a bonus video with some additional diagnostic information where you can see the algorithm struggle with (and in some instances break down from) difficult lighting and road surface conditions.
Again, if it’s the technical stuff you’re into, go here.